In this guide, we’ll walk through the best way to clean your RV roof using a proven method, featuring the highly rated Bio-Kleen M02409 RV Roof Cleaner and Protectant. With step-by-step instructions and pro tips, you’ll have your RV roof sparkling in no time.
Note: This article may include affiliate links to products we recommend. If you choose to purchase, rest assured it costs you nothing extra, and we may earn a small percentage to help support this website. Thank you!
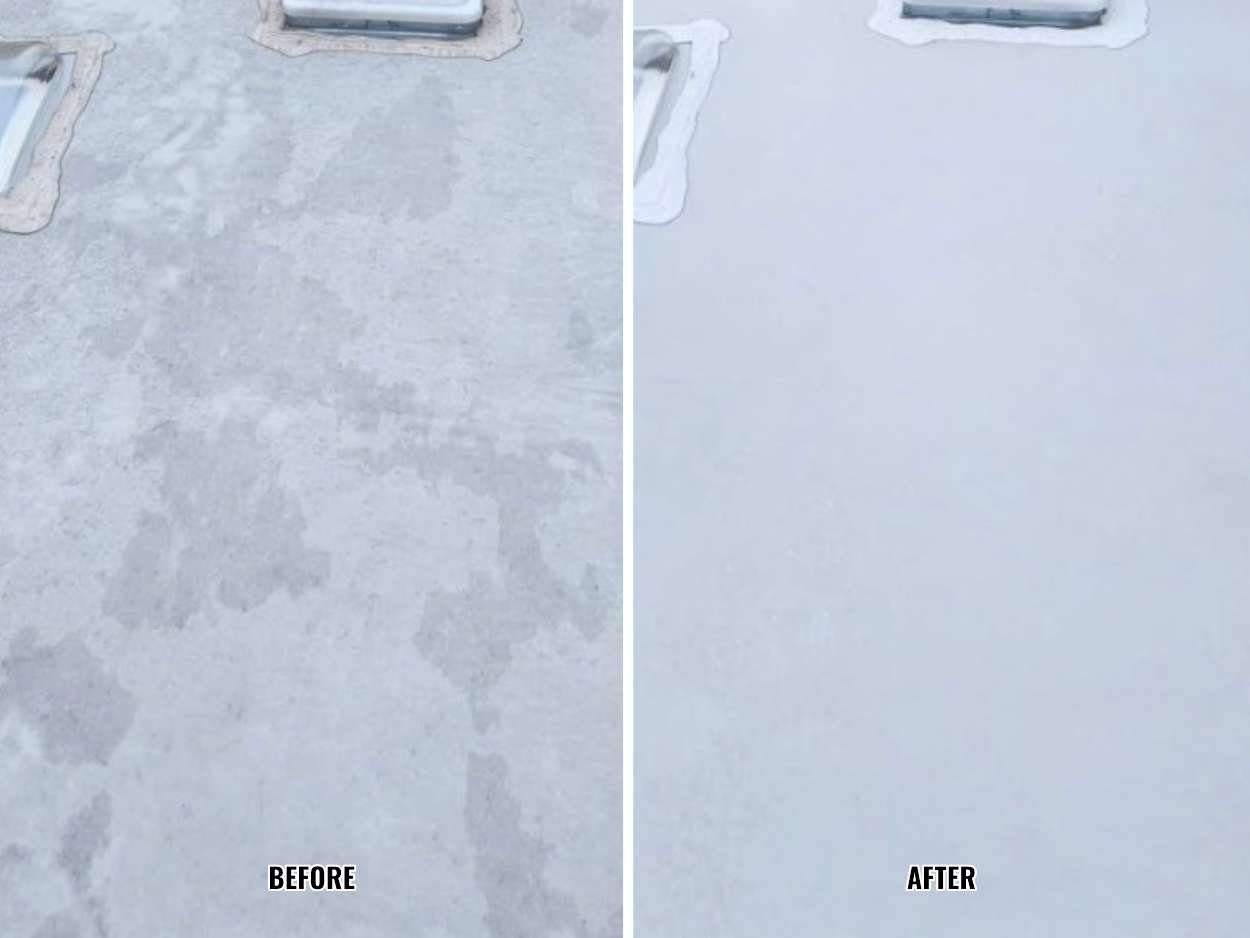
Why Cleaning Your RV Roof Matters
A clean RV roof not only looks great but also extends the life of your rig by protecting it from UV damage, mold, and black streaks.
Your RV roof—whether it’s made of EPDM, TPO, or PVC—takes a beating from the elements. Sun exposure, rain, dirt, and tree sap can cause chalking, mold, and black streaks that degrade the material over time. Regular cleaning removes these contaminants, preserves sealants, and maintains the roof’s protective coatings. Products like Bio-Kleen M02409 not only clean but also add UV protection (SPF 70), reducing future dirt buildup and keeping your RV looking fresh for months.
What You’ll Need
Before you climb that ladder, gather these essentials:
Step-by-Step Guide to Cleaning Your RV Roof
Follow these steps to clean your RV roof effectively while avoiding common pitfalls like streaking or sealant damage.
1. Set Up for Success
- Choose the right time: Park your RV in a shaded area to prevent the cleaner from drying too quickly. Early morning or late afternoon works best.
- Wet the RV: Use a garden hose to soak the entire RV, including the sides, to minimize streaking from runoff. Keep the sides damp during the process.
- Clear the area: Move vehicles or waxed surfaces away to avoid damage from overspray.
2. Mix the Cleaner
- Dilute Bio-Kleen in a pressure sprayer or bucket. A 1:3 or 1:4 ratio (1 part cleaner to 3-4 parts water) is ideal for most roofs. For heavily soiled roofs, you can use it undiluted, but this is rarely needed.
- Pro Tip: One gallon covers multiple cleanings so don’t overdo it. A liter diluted in a couple of gallons of water can clean a large roof.
3. Apply the Cleaner
- Work in small sections (e.g., 6-foot sections across the roof) to keep the process manageable and prevent drying.
- Spray or pour the diluted solution onto a section. Let it sit for 3-5 minutes to loosen dirt, but don’t let it dry.
- For curved roofs, apply smaller amounts to control runoff and reapply as needed.
4. Scrub Gently
- Use a soft-bristled brush to scrub the section lightly. For stubborn dirt or black streaks, apply a bit more pressure or a second application. Expect 7-10 minutes per section.
- Caution: Go easy near silicone sealants, as the cleaner may thin them slightly. Dicor sealants are generally fine but inspect afterward.
5. Rinse Thoroughly
- Rinse the scrubbed section immediately with a hose to remove all cleaner and debris.
- If possible, have a second person rinse the RV sides at the same time to prevent residue from drying and causing streaks. Dried residue can strip wax and require extra cleanup.
- For extra cleaning power, let the solution sit 1-2 minutes post-scrub before rinsing.
6. Finish Up
- After cleaning the entire roof, give the whole RV a final rinse, paying close attention to the sides to remove any leftover residue.
- Let the roof dry naturally. Bio-Kleen’s protectant leaves a smooth finish that resists dirt and UV damage for months.
- Avoid waxing the RV until after roof cleaning to prevent residue from sticking to waxed surfaces.
Pro Tips for a Flawless Clean
Common Mistakes to Avoid
Why Bio-Kleen Stands Out
Bio-Kleen M02409 is a favorite among RVers for good reason. Its eco-friendly formula tackles mold, black streaks, and chalky residue without harsh chemicals. The built-in SPF 70 UV protectant forms a smooth barrier that keeps dirt at bay, meaning less frequent cleanings. Users on Amazon report roofs looking “beautifully white” even after years of neglect, with sealants appearing refreshed. While it requires some scrubbing for tough dirt, it outperforms alternatives like Dawn in speed and longevity.
List of Products Recommended in This Article
In order to offset the cost of this site, some or all links are affiliate links.
It costs you nothing extra and we get a tiny commission if you buy.
All links open in a new tab.
Final Thoughts
Cleaning your RV roof the right way takes a bit of effort, but the payoff is a rig that looks great and lasts longer. With these steps, you can avoid streaks, protect your investment, and hit the road with confidence. Whether you’re a weekend camper or a full-time RVer, keeping your roof in top shape is not that difficult. Just follow this guide, stay safe, and enjoy the shine.
Happy camping, and happy cleaning!